|
Home > Guides > Sprouts > Herb Sprouts |
|
How to Grow Herb Sprouts | Guide to Growing Herb Sprouts |
|
|
| |
 |
|
Overview |
|
|
|
|
|
| |
|
| |
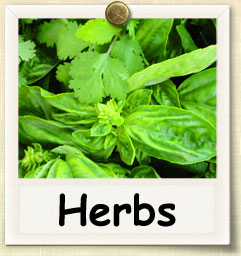
A number of of plants commonly grown as medicinal or culinary herbs also produce flavorful and nutritious sprouts that can be added to salads, sandwiches and other dishes that call for a fresh, crunchy texture. Some of the more common herbs that are also consumed as sprouts include fenugreek, garlic, dill and mustard, although many others can safely and easily be enjoyed as well. The principal obstacles to sprouting herbs are cost and availability. In many cases, herb seeds are simply too rare and expensive to sprout for general culinary purposes, and may be better suited to occasional use to appreciate the sometimes exotic qualities of these sprouts. |
|
| |
|
|
| |
Growing Guide
GROWING NOTES
Sprouting herbs is easy, and can be accomplished in much the same manner as other types of sprouts. Some seeds, such as dill, are very small and care should be taken when soaking. Excessive soaking may damage the seeds. In most cases, 4 hours should be enough to loosen the seed coat and promote proper germination.
Procedure:
- To start your sprouts, you will want to soak your seeds in a bowl of cool water for 4-6 hours, or overnight, making certain that seeds are submersed and not floating on top of the water. This will soften the seed coat and promote germination. After soaking, thoroughly drain off all water. It is wise to rinse seeds immediately after soaking to clean them and wash away an extraneous matter, and again drain off all excess water.
- Wait several hours, then later in that day: Rinse seeds with cool, clean water. Carefully drain off all water so seeds at bottom of sprouter are not covered with water.
- Repeat this process of rinsing with cool water and draining 3-4 times per day as your seeds mature, and even as you begin to harvest and consume them. As your sprouts grow, it is important that they receive good air circulation. Many types of sprouters, such as simple canning jar types, provide good circulation with the tilting motion necessary for complete drainage. Keep your container on your kitchen table or counter, or similar location that has dependable lighting and airflow.
- Once sprouts have reached a desirable state for consumption, they can be transferred out of sprouter and placed under refrigeration to prolong their lifespan. This is not necessary but will slow down the growth process and give you a larger window to eat your sprouts. Continue to rinse and thoroughly drain sprouts as needed. Sprouts should not be allowed to dry out, as they can quickly lose their vitality and nutritional content.
- Clean sprouter thoroughly after use.
|
|
| |
|
|
|
| |
|
|

|
|